jobs
Posting a role and hiring
Post a freelance or full-time role, add reference images, manage the post through its life, review applicants, and mark a hire.
Updated 24 June 2026
This page covers the hiring side of the job board: creating a post, adding images, managing it, reviewing who applies, and picking someone. For the applicant side, see Finding and applying for work.
Posting a role
Open Post a job from the Jobs section to start a new post.
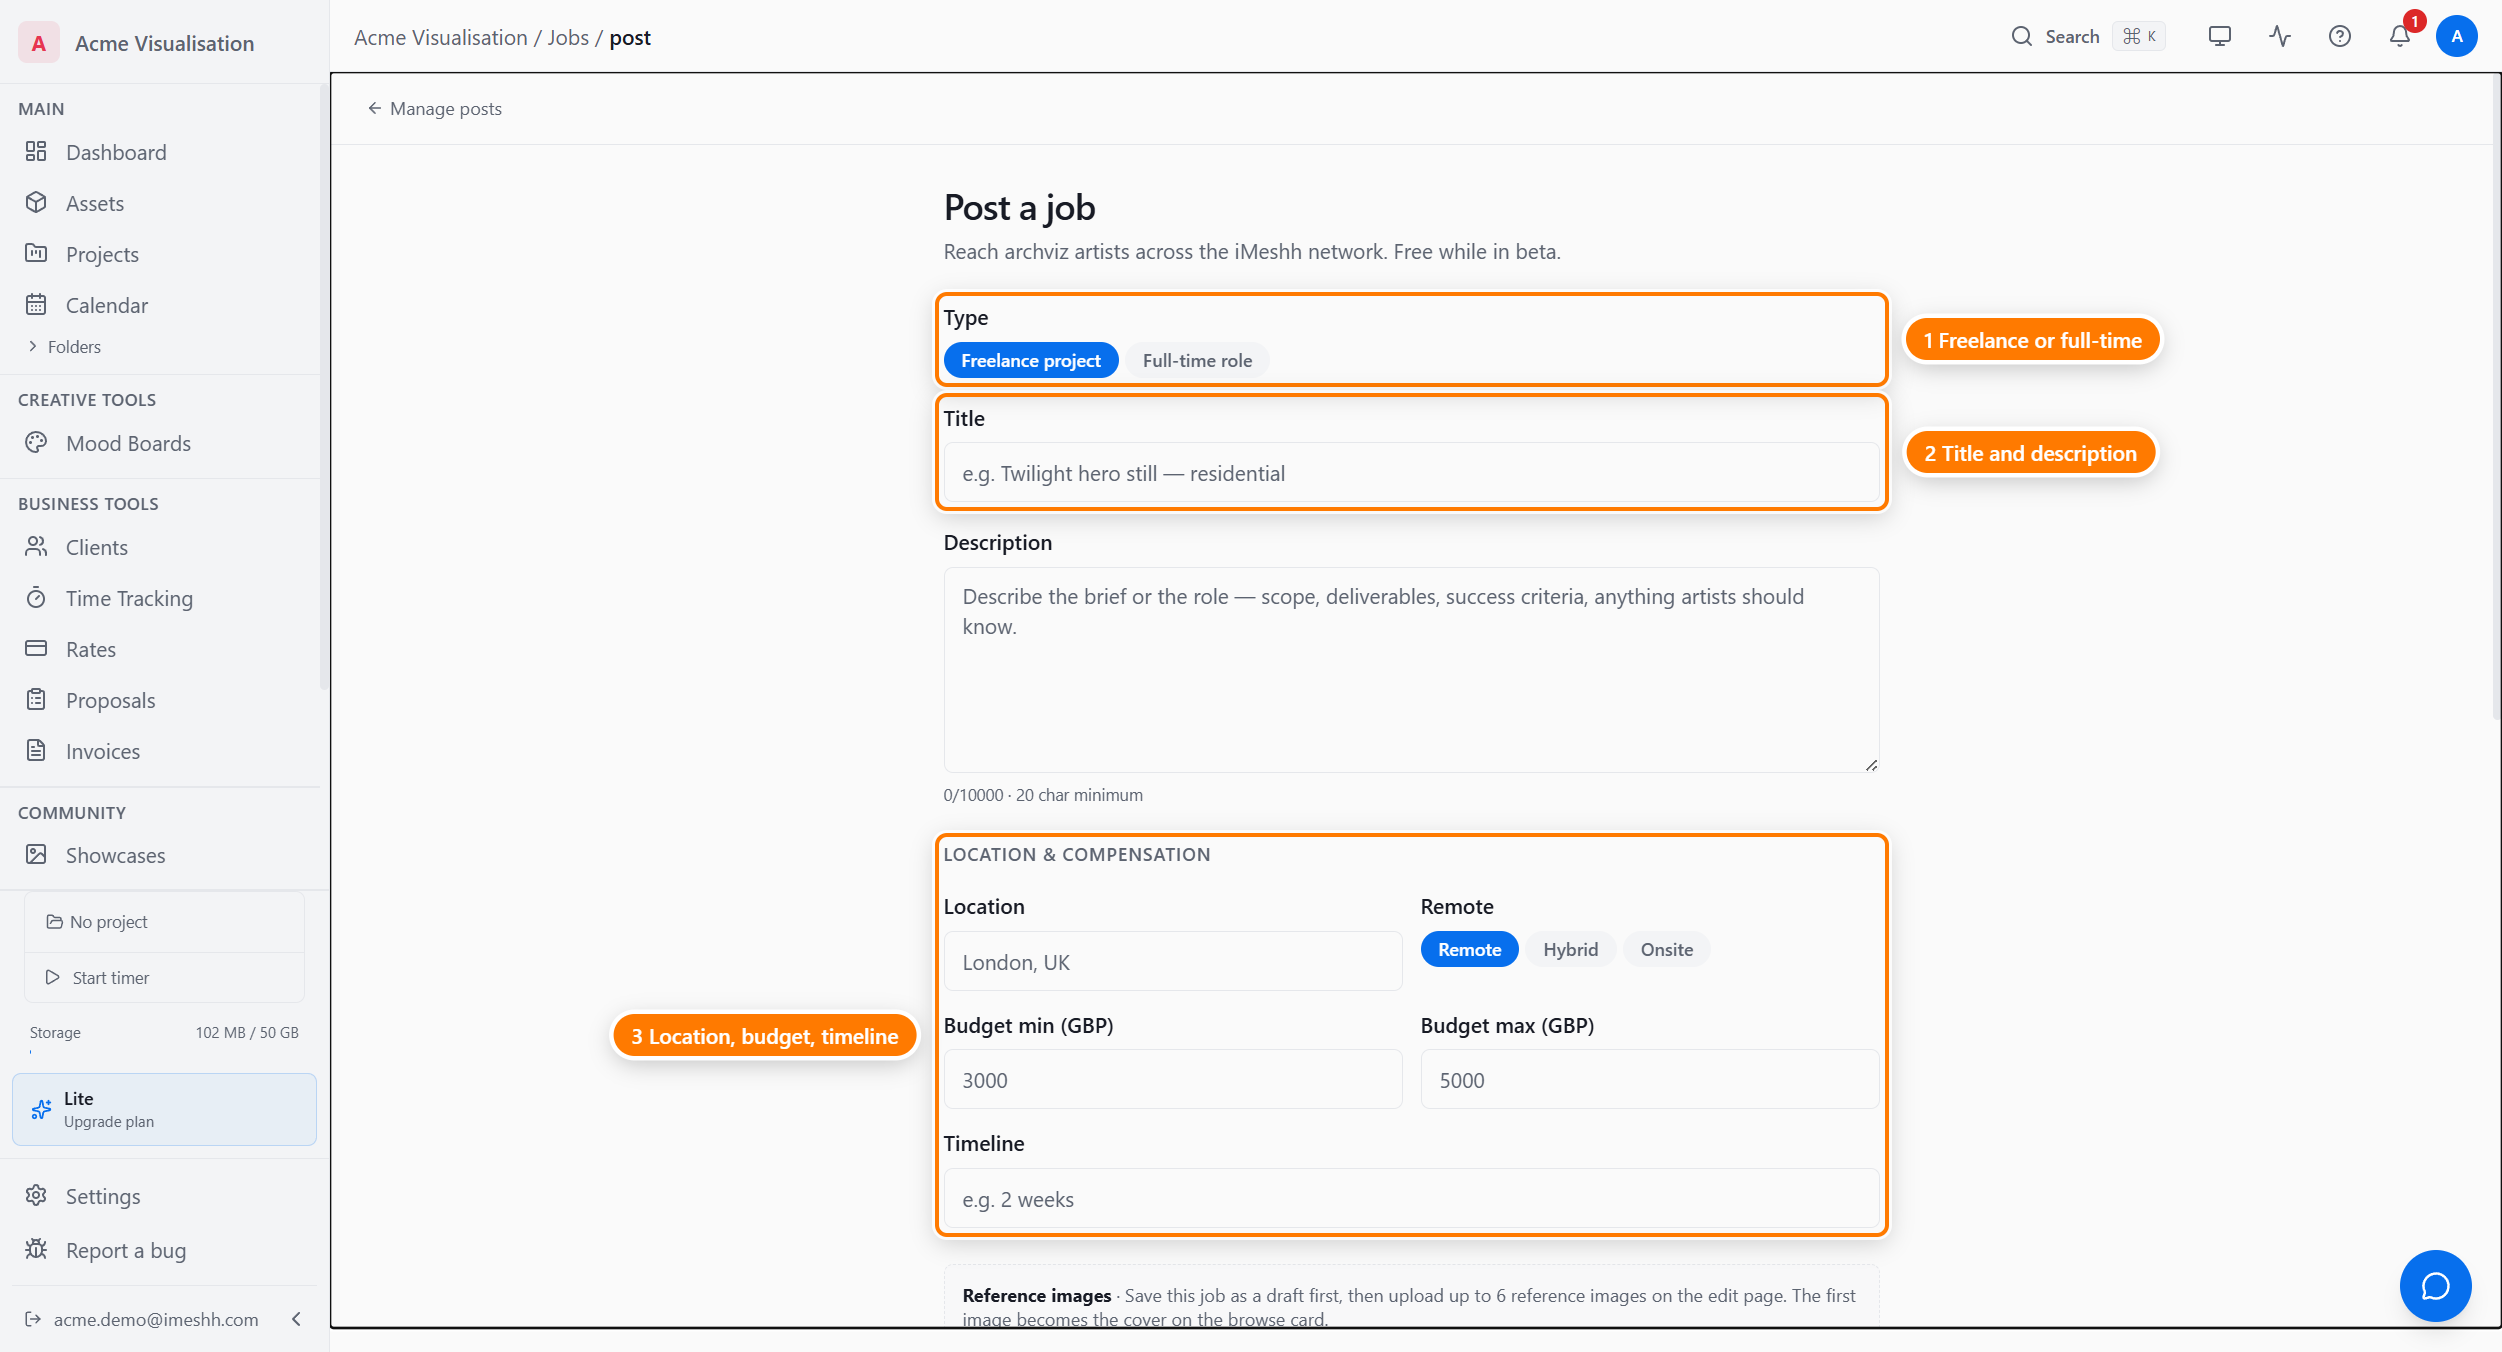
Fill in the form in order:
- Pick the type — Freelance for a one-off gig, or Full-time role for a permanent hire. The fields below change to match.
- Write the title and description of the role.
- Set the budget or salary. Freelance posts ask for a budget range; full-time posts ask for a salary range and a Level (Junior, Mid, Senior, Lead, or Director).
- Add the timeline and location, and choose Remote, Hybrid, or On-site.
- Fill in the requirements — the software, render engines, deliverables, sectors, and categories the role needs.
- Set the options — turn on NDA required if applicants must agree to one, and leave Blind apply on to keep applicant names hidden until you shortlist.
Save as draft or publish
You have two ways to finish:
- Save the post as a draft to keep working on it later. A draft is private to your studio and never appears on the board.
- Publish the post to send it live. If your studio is verified, it goes live straight away. If not, you see a Submitted for moderation message while iMeshh reviews it. See moderation.
Reference images
You add reference images after first saving the post — they're not part of the create form. Open the post for editing to reach the image editor.
In the editor you can:
- Upload images — up to 6 images, each up to 20 MB, in JPEG, PNG, or WebP
- Reorder them with the up and down arrows
- Set one as the cover that shows on the browse card
- Mark an image as an Example to label it as a sample of the look you want
- Delete an image you no longer need
Managing your posts
Open Manage posts to see every post your studio has, drafts included, with the actions for each one.
Each row shows the post's status and how many applicants it has. The status tells you where the post stands:
- Draft — not published
- Pending moderation — published and waiting for iMeshh to review
- Open — live and collecting applications
- Paused — temporarily hidden from the board
- Closed — finished and no longer accepting applications
The action buttons on each row let you move a post through its life:
- Pause — hide an open post from the board without closing it
- Resume — bring a paused post back. If your studio is not verified, it goes back for review first.
- Close — end the post. This cannot be undone.
- Edit — change the post's details and images
- Delete — remove a draft or closed post
Reviewing applicants
Click a post in Manage posts to open its applicants.
The stage tabs across the top group applicants by where they are, with a count on each:
- All — every applicant, across all stages
- New — applied, not yet reviewed
- Shortlist — ones you're considering
- Interview — ones you're talking to
- Offer — ones you've made an offer to
- Hired — the applicant you took on
- Rejected — ones you've turned down
- Withdrawn — ones who pulled their own application
Each applicant row shows their pitch, their quote or rate, and their specialty chips. Specialties are always visible — they help you triage. The applicant's name, portfolio, and reel stay hidden until you shortlist them, unless they chose to reveal their identity.
For each applicant you can:
- Move them to the next stage — shortlist, interview, offer, and so on
- Star them to mark a favourite
- Add a private note that only your studio sees
- Reject them — this notifies the applicant
- Message them — once an applicant is shortlisted, start a conversation. It opens in your Messages inbox.
Hiring someone
When you've decided, mark the hire. This action is for Owners and admins only.
- Open the applicant you want to hire from the applicants view.
- Click to hire them. You're asked to confirm.
- Confirm. The applicant is marked as hired and the post closes automatically.
Payment and contracts are arranged off-platform, directly between you and the person you hired. iMeshh takes no fee and is not part of the agreement.
What's next
- Finding and applying for work — the applicant side of the board
- The job board — plan access, moderation, and blind apply
- Messages — where conversations with applicants appear