time-tracking
Managing time entries
Add a manual time entry, continue a past session, edit or delete an entry, filter the list, and understand why invoiced entries lock.
Updated 24 June 2026
This page covers what you do with time entries once they exist — adding time you didn't track live, editing or deleting an entry, restarting a past session, filtering the list, and the lock that applies once an entry reaches an invoice. For the timers and the billable flag, see the Time Tracking overview.
Add a manual entry
Use a manual entry for time you didn't track with a timer — yesterday's call, last week's client meeting.
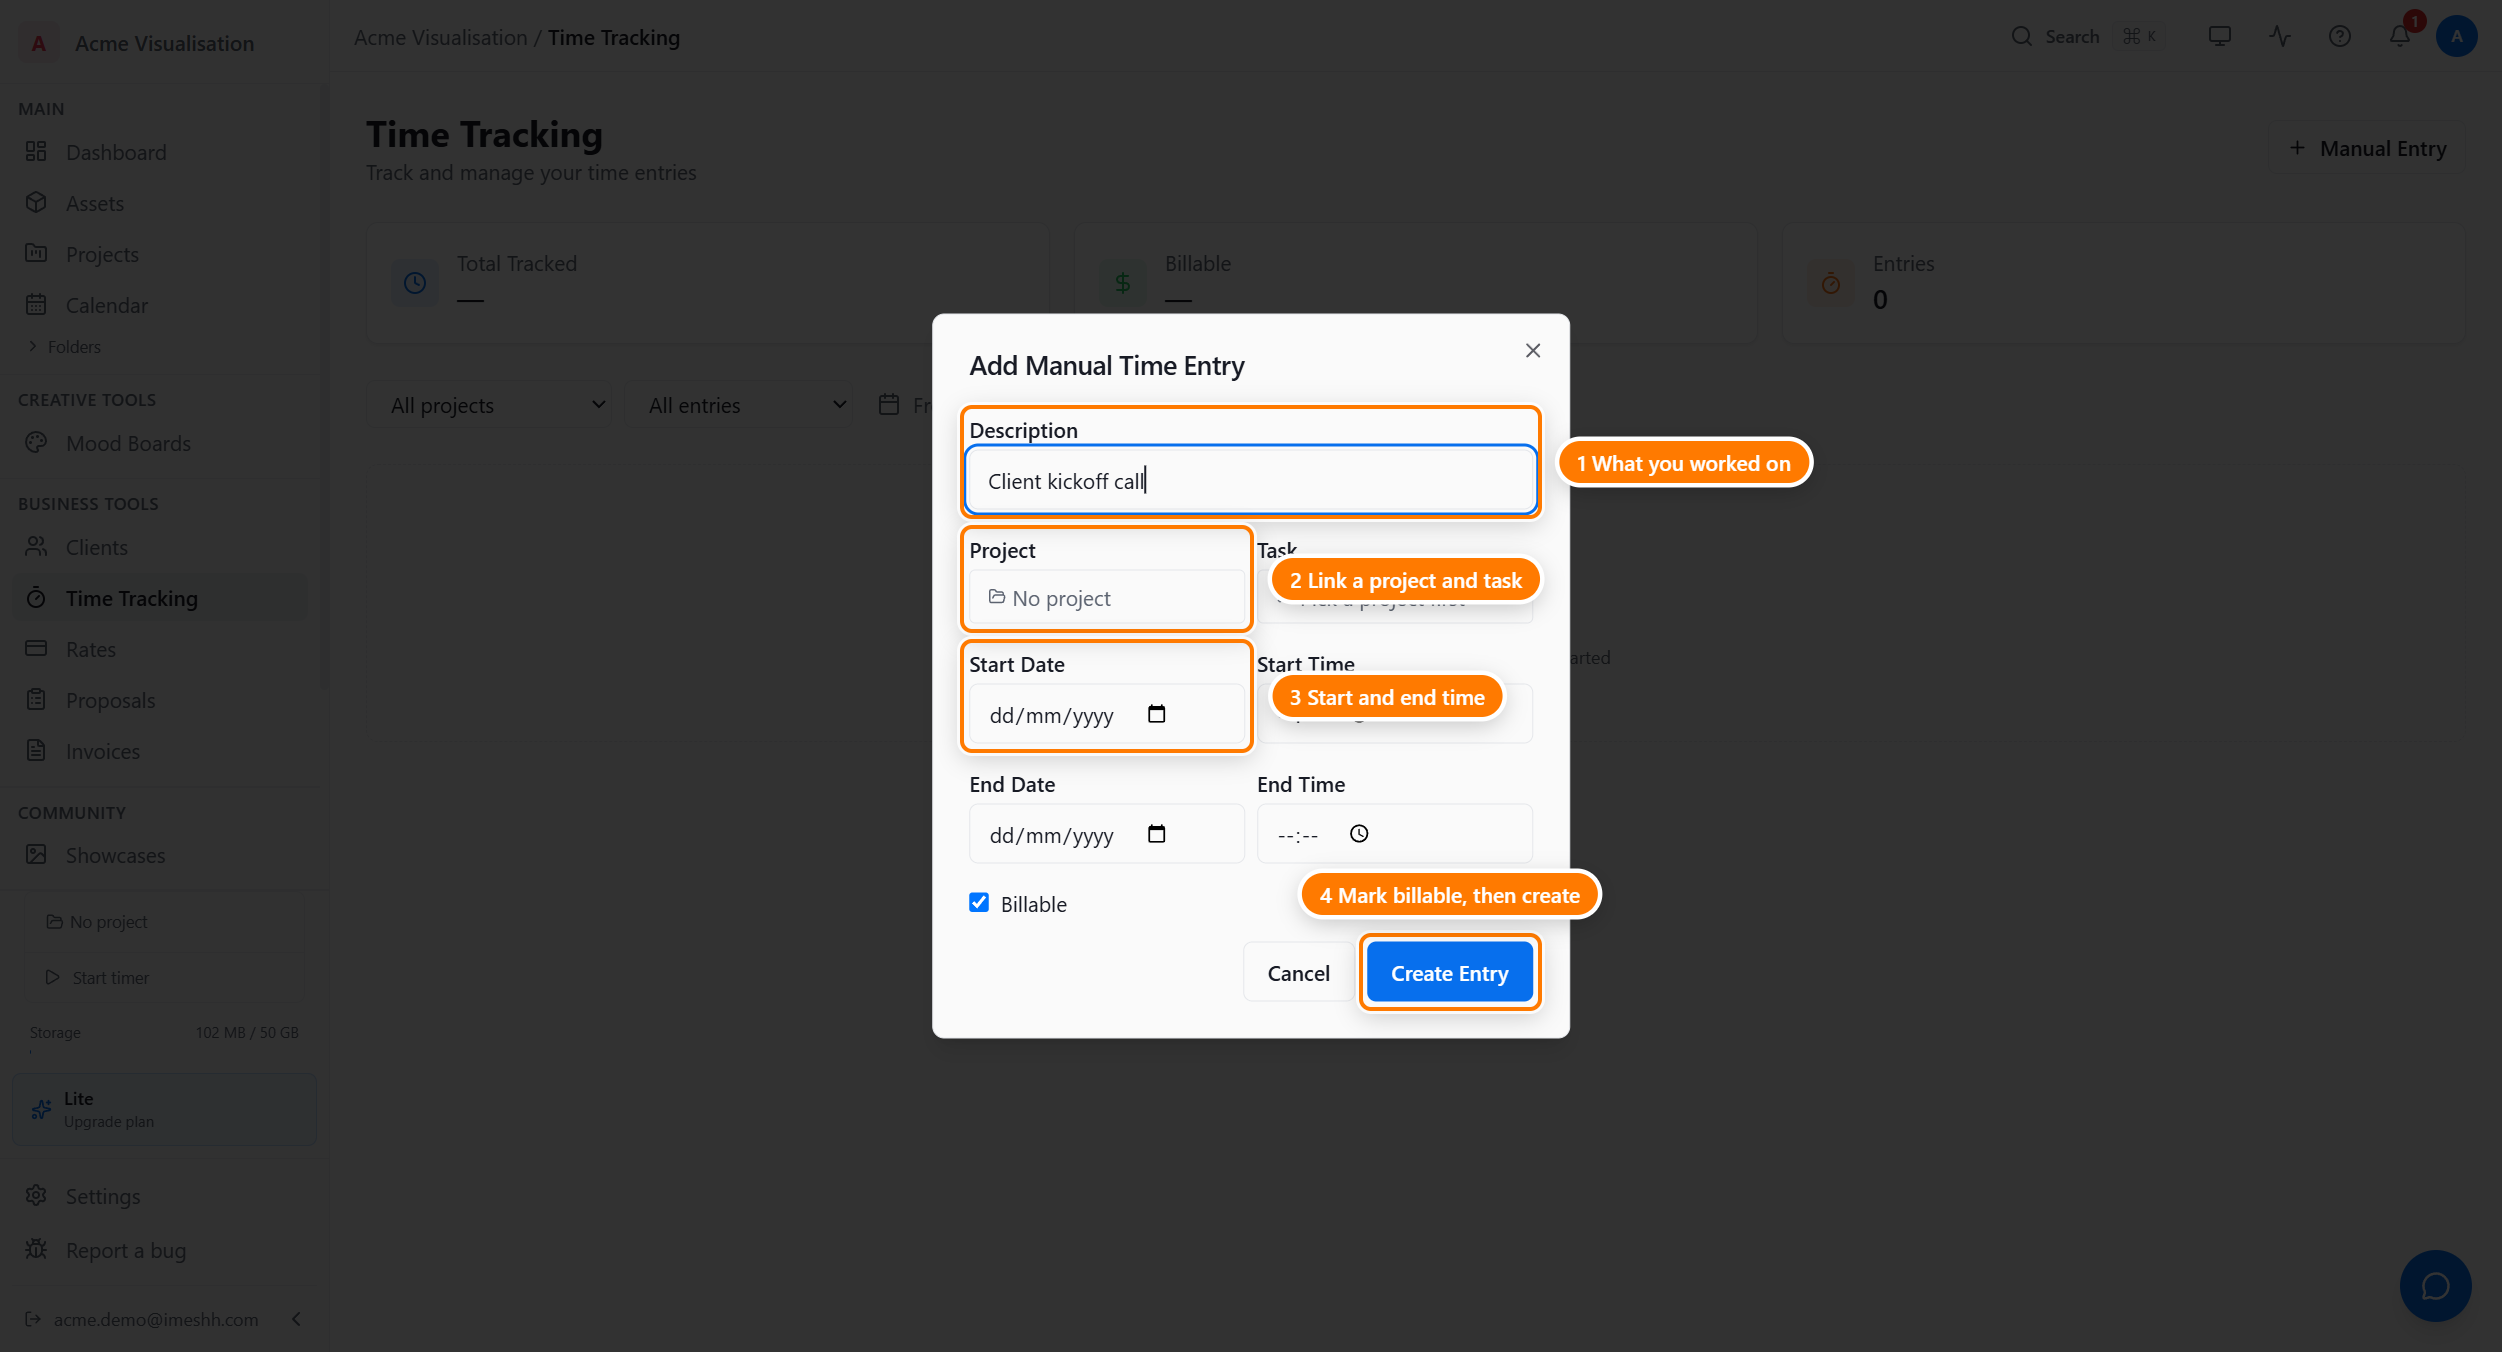
- Click Manual Entry.
- Type a description of what the work covered.
- Pick a project if the time belongs to one. This is optional — leave it blank to log time with no project.
- Pick a task if you want to track against one.
- Set the start date and time, then the end date and time. The dialog shows the duration as you set them.
- Turn Billable on or off.
- Click Create Entry.
Continue a past session
Each completed entry has a play button that starts a fresh timer using the same description, project, and task. Use it to pick up where an earlier session left off without filling in the fields again.
The play button is disabled while any timer is running. Stop the running timer first, then continue the entry you want.
Edit an entry
Open an entry to change any of its fields, including which project it belongs to.
- Click the pencil icon on the entry's row.
- Change the description, project, task, start time, end time, or Billable flag.
- Click Save.
Moving an entry to a different project is supported — pick the new project in the project field and save. You can edit only your own entries; managers and owners can edit anyone's.
Delete an entry
Click the trash icon on the entry's row to remove it. You can delete only your own entries; managers and owners can delete anyone's.
Entries linked to an invoice
Once an entry is pulled into an invoice, it locks. The pencil and trash icons disappear from that row — you can't edit or delete an entry that's already on an invoice.
Invoiced entries cannot be changed. If you need to correct the time, contact the person who created the invoice.
Filter the list
The filter row above the entries table narrows what you see. The stat cards update to match.
Use any of these together:
- Project — show one project's entries. Pick a project and a second task filter appears, so you can narrow to a single task. Clearing the project clears the task.
- Billable status — show All entries, only billable, or only non-billable.
- Date range — set a From date, a To date, or both.
The list and the stat cards reflect whatever combination you set. There's no Apply button — the list updates as you change a filter.
What's next
- Time Tracking overview — the timers, the page, and the billable flag
- Invoices — turning billable time into client invoices