projects
Members and roles
Who can do what on a project — Lead, Contributor, Viewer — and how to hide specific tabs from individual members.
Updated 23 June 2026
Every project has its own team. Adding a project member is separate from inviting someone to your studio — a person can be in the studio but not on a project. This page covers who can do what.
Adding someone to a project
Open the project, go to People → Team, and click Add Member.
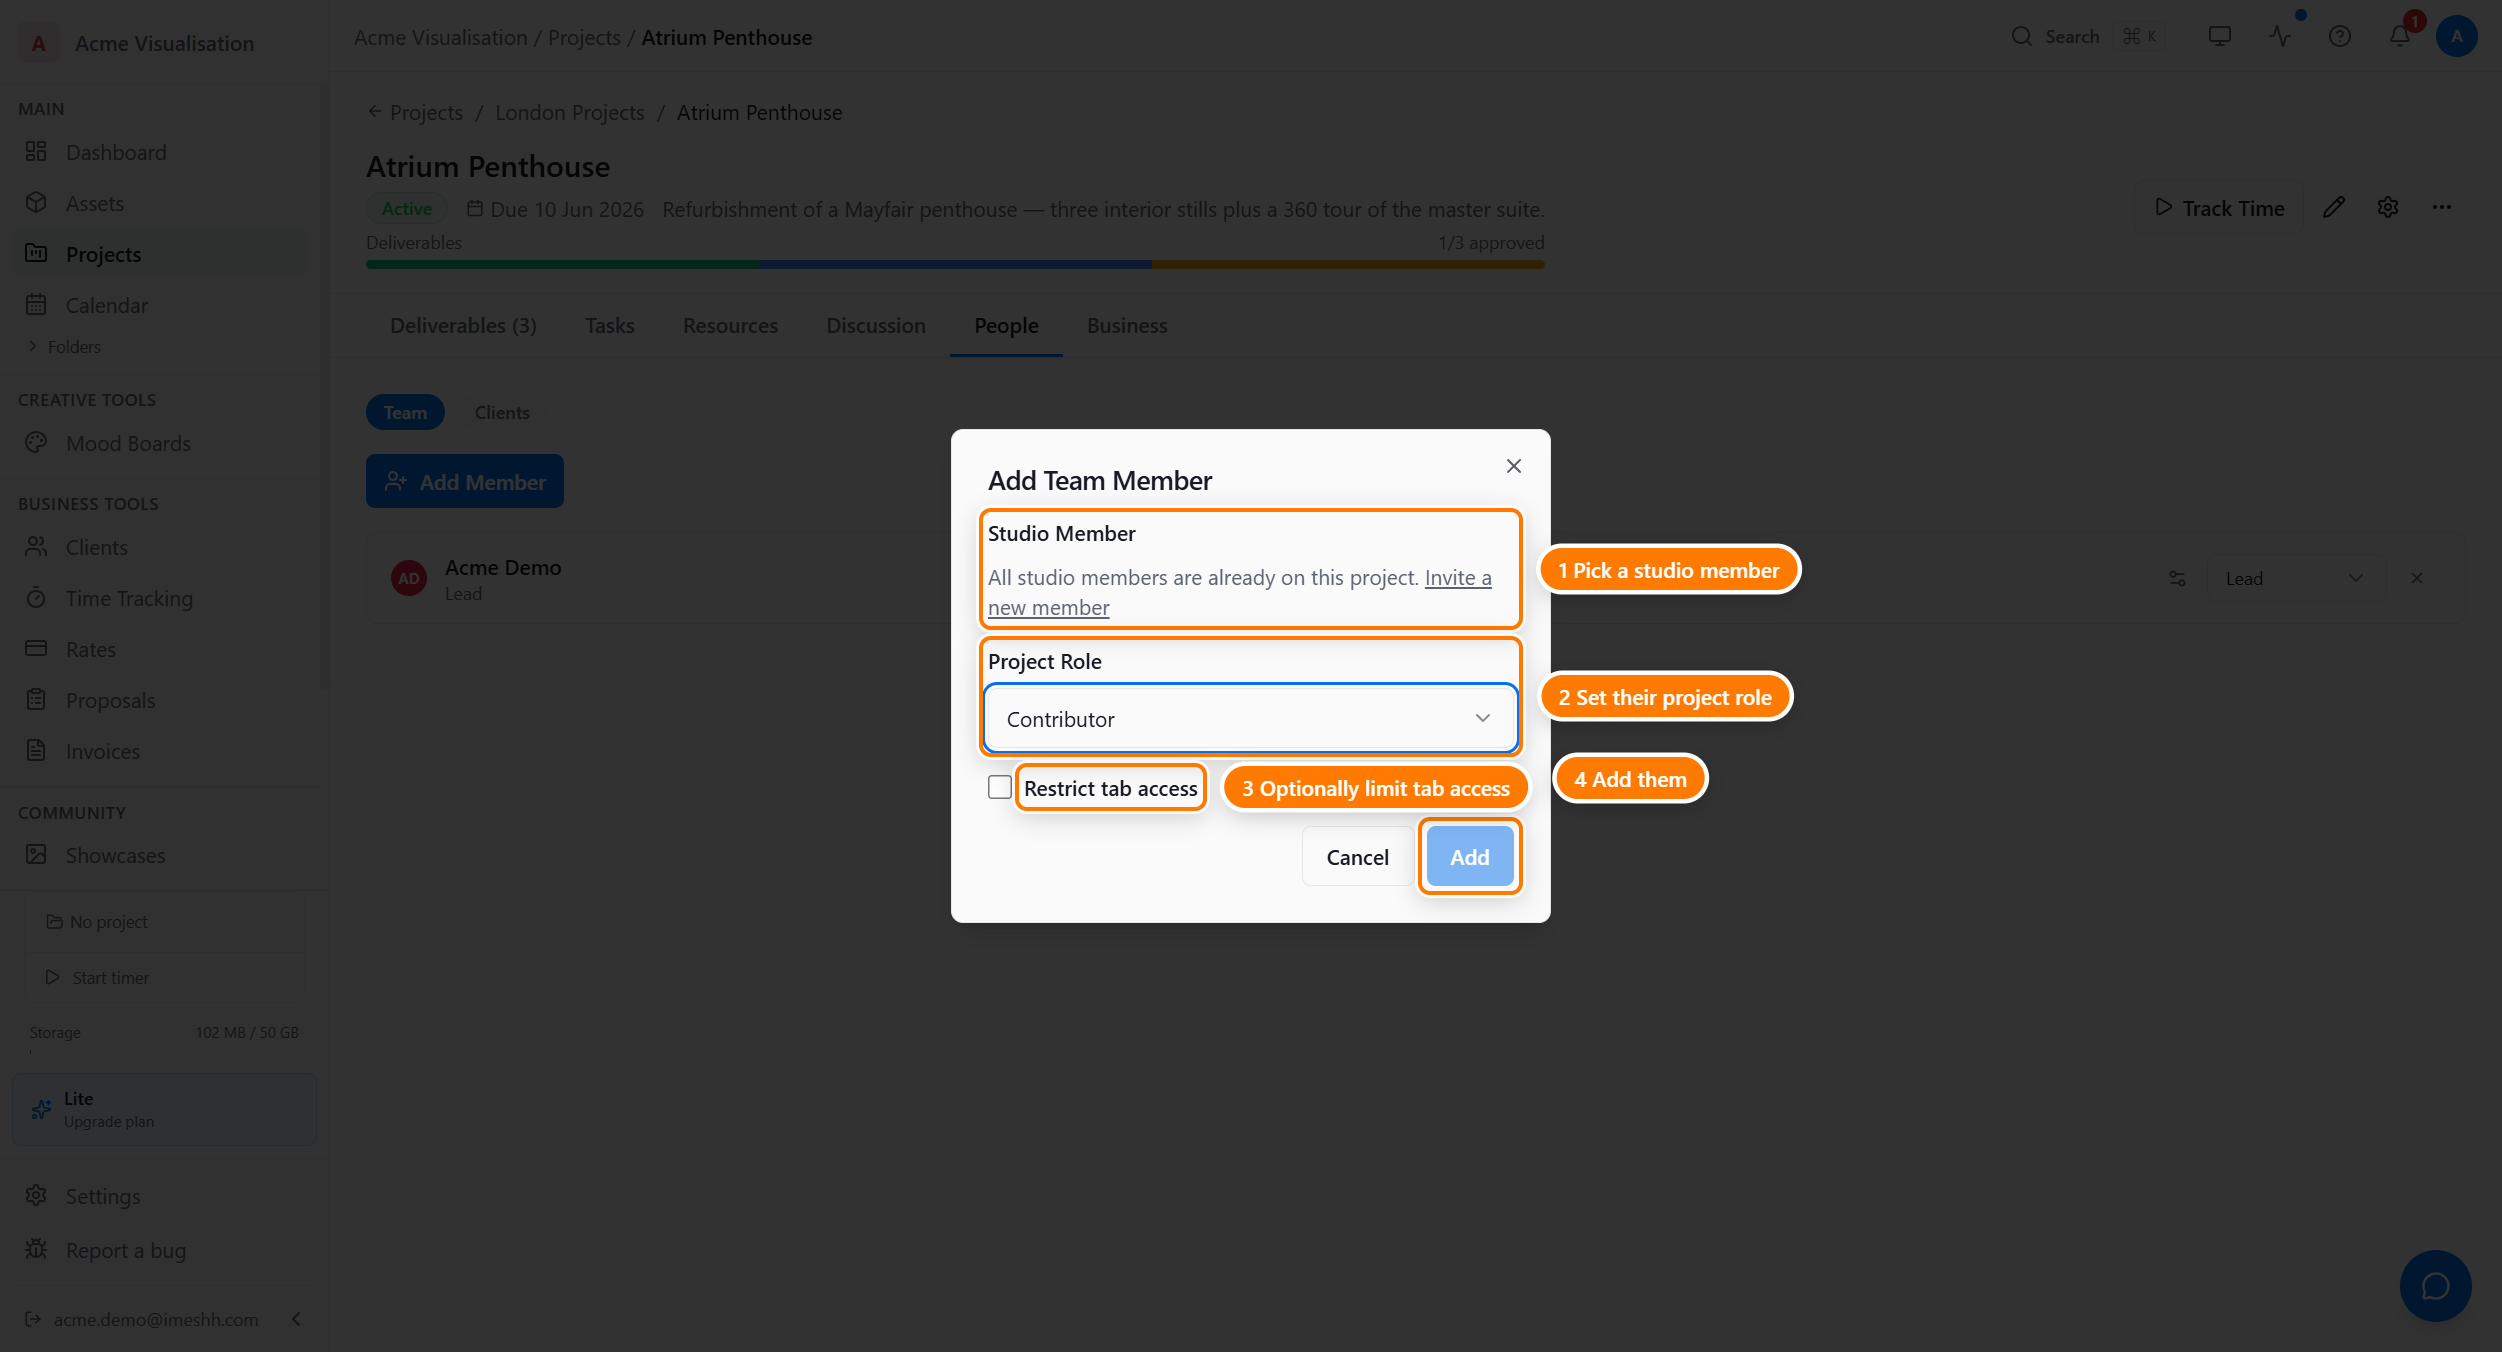
The Studio Member dropdown only lists people who are already in your studio. If the person isn't in your studio yet, click Invite a new member to add them to the studio first — they appear in the dropdown once they accept.
Pick a Project Role and click Add to put them on the project.
The three roles
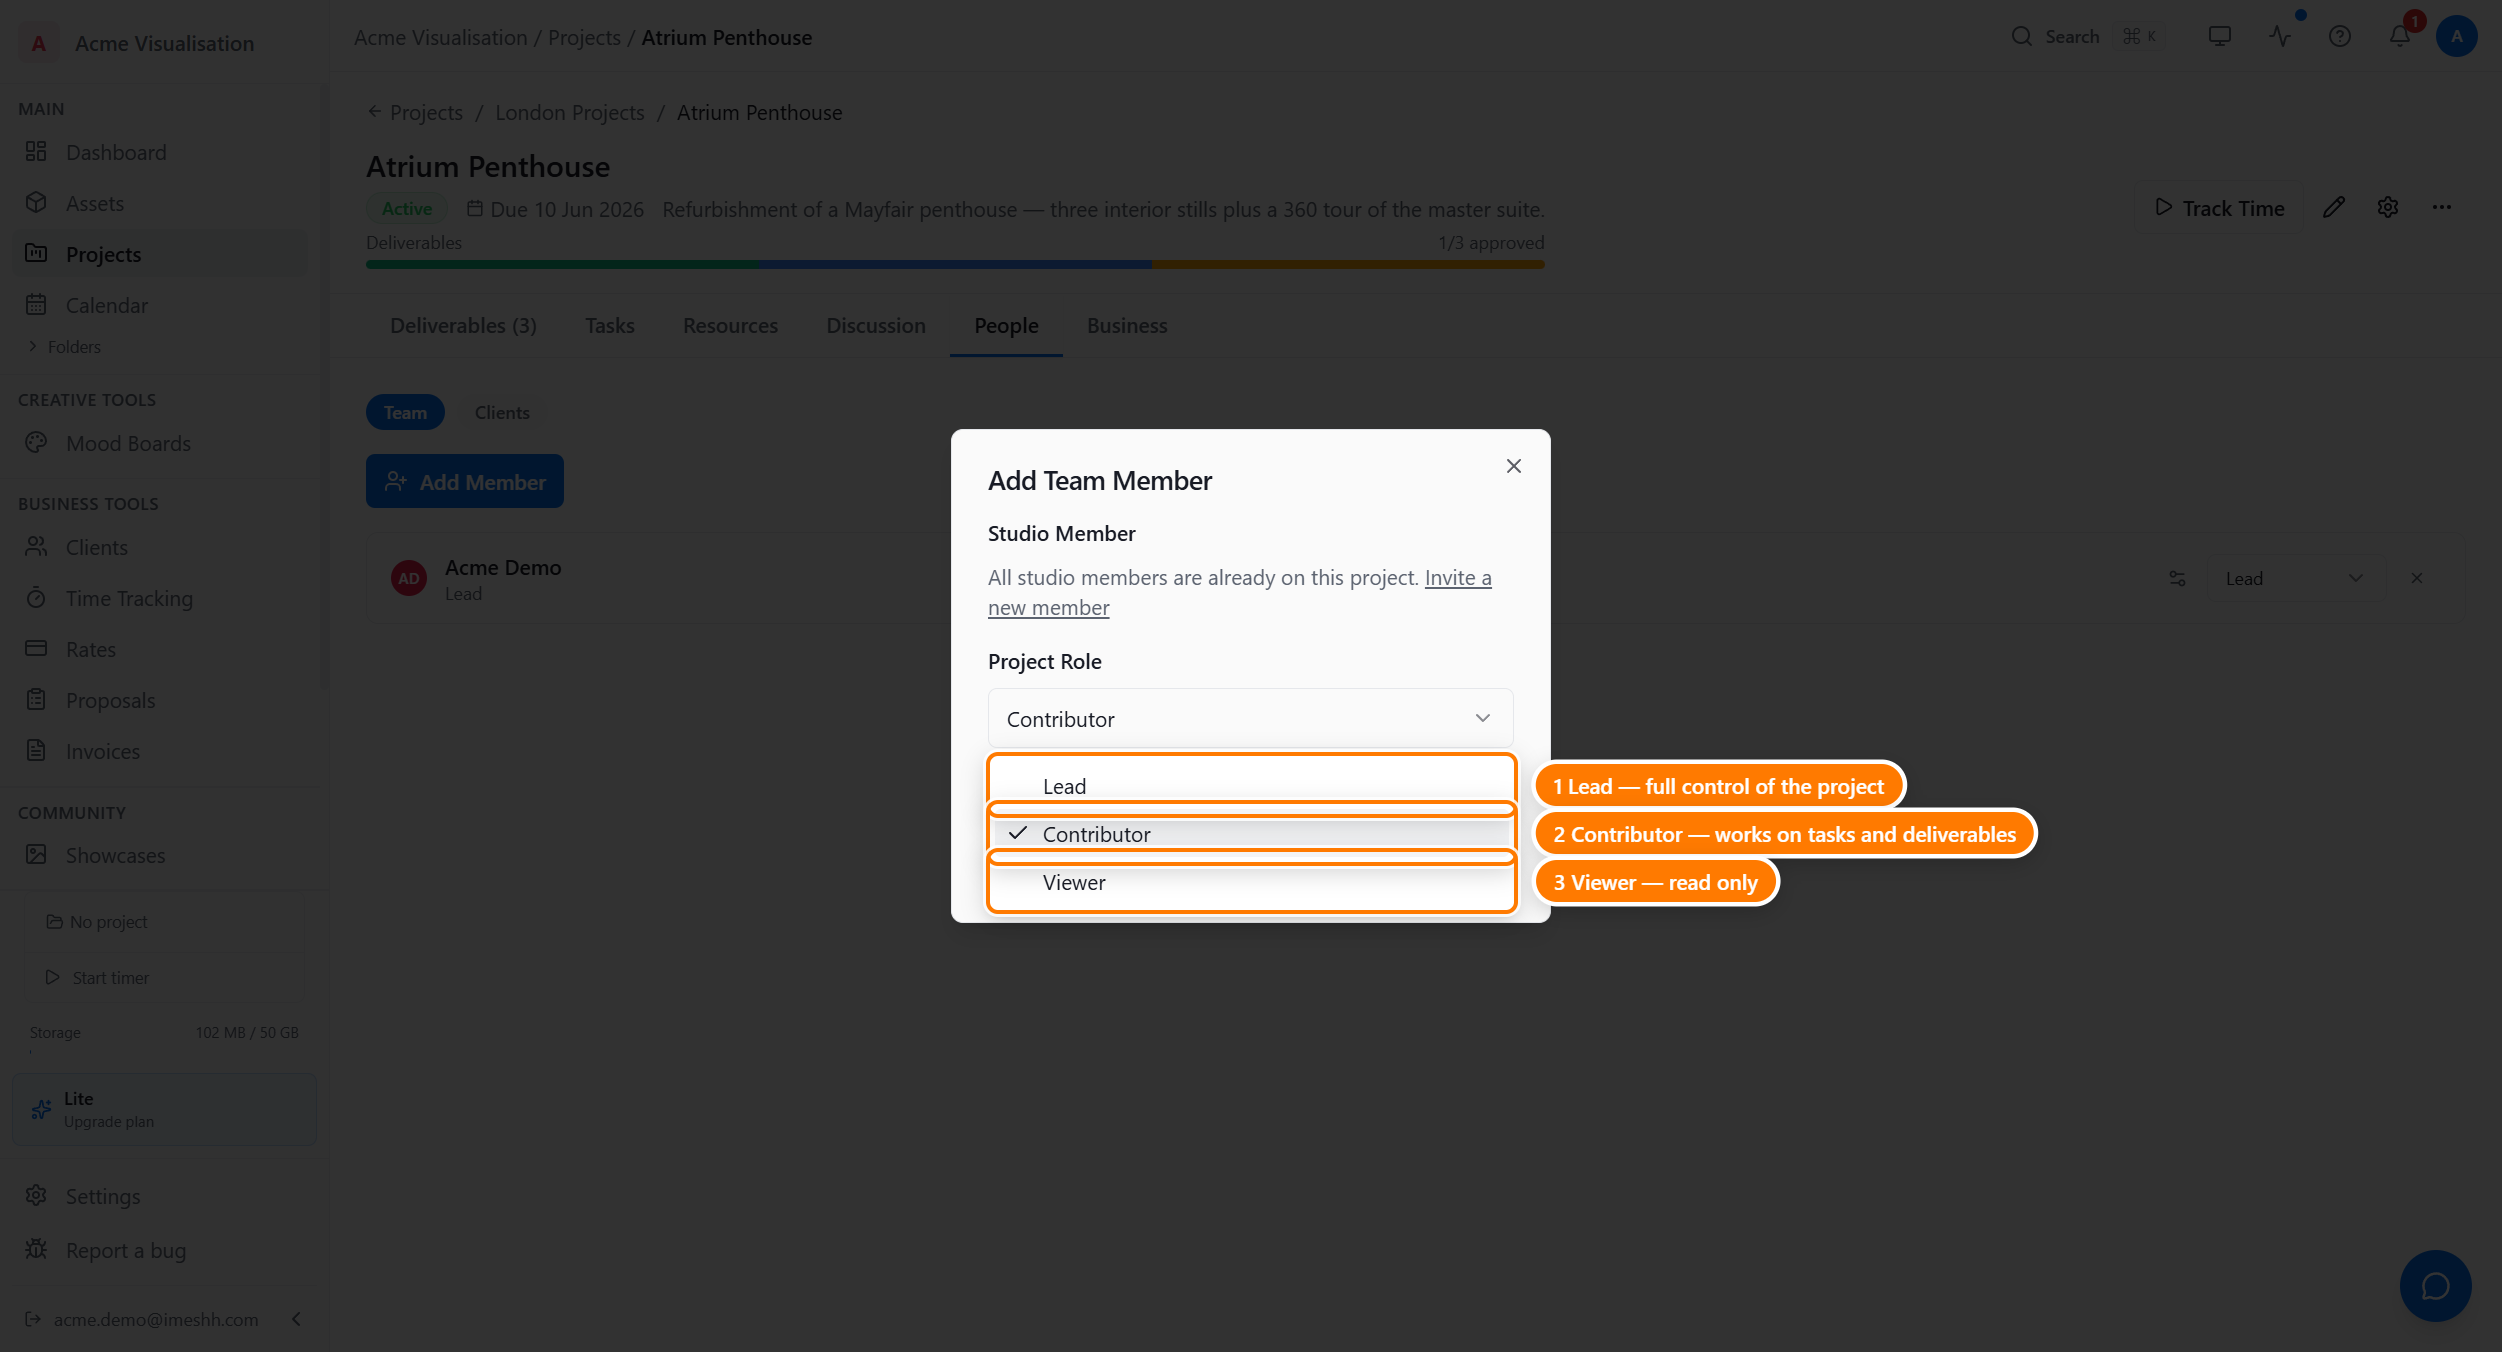
What each role can do:
| Action | Lead | Contributor | Viewer |
|---|---|---|---|
| See the project | ✓ | ✓ | ✓ |
| View deliverables, tasks, files | ✓ | ✓ | ✓ |
| Comment on deliverables and tasks | ✓ | ✓ | — |
| Create deliverables, tasks, files | ✓ | ✓ | — |
| Upload deliverable versions | ✓ | ✓ | — |
| Approve or request revisions on deliverables | ✓ | — | — |
| Manage members (add, remove, change roles) | ✓ | — | — |
| Edit project details (name, deadline, value) | ✓ | — | — |
| Move to folder, mark completed, archive | ✓ | — | — |
| Manage share links | ✓ | — | — |
| Delete the project | Owners and admins only | — | — |
In short:
- Lead — full control of the project. The person running it for the studio.
- Contributor — does the day-to-day work but can't make project-lifecycle decisions.
- Viewer — can see what's happening but can't change anything.
A project can have several leads. When you create a project, you're added as a lead, along with every studio owner and admin. Those auto-added owner and admin leads can't be removed from the project.
Per-member tab restrictions
On top of the role, you can hide specific tabs from individual members — useful when you want a freelancer to see only Tasks and Deliverables and nothing else.
Click the Edit tab permissions icon next to the member's row on the People tab, then turn on Restrict tab access.
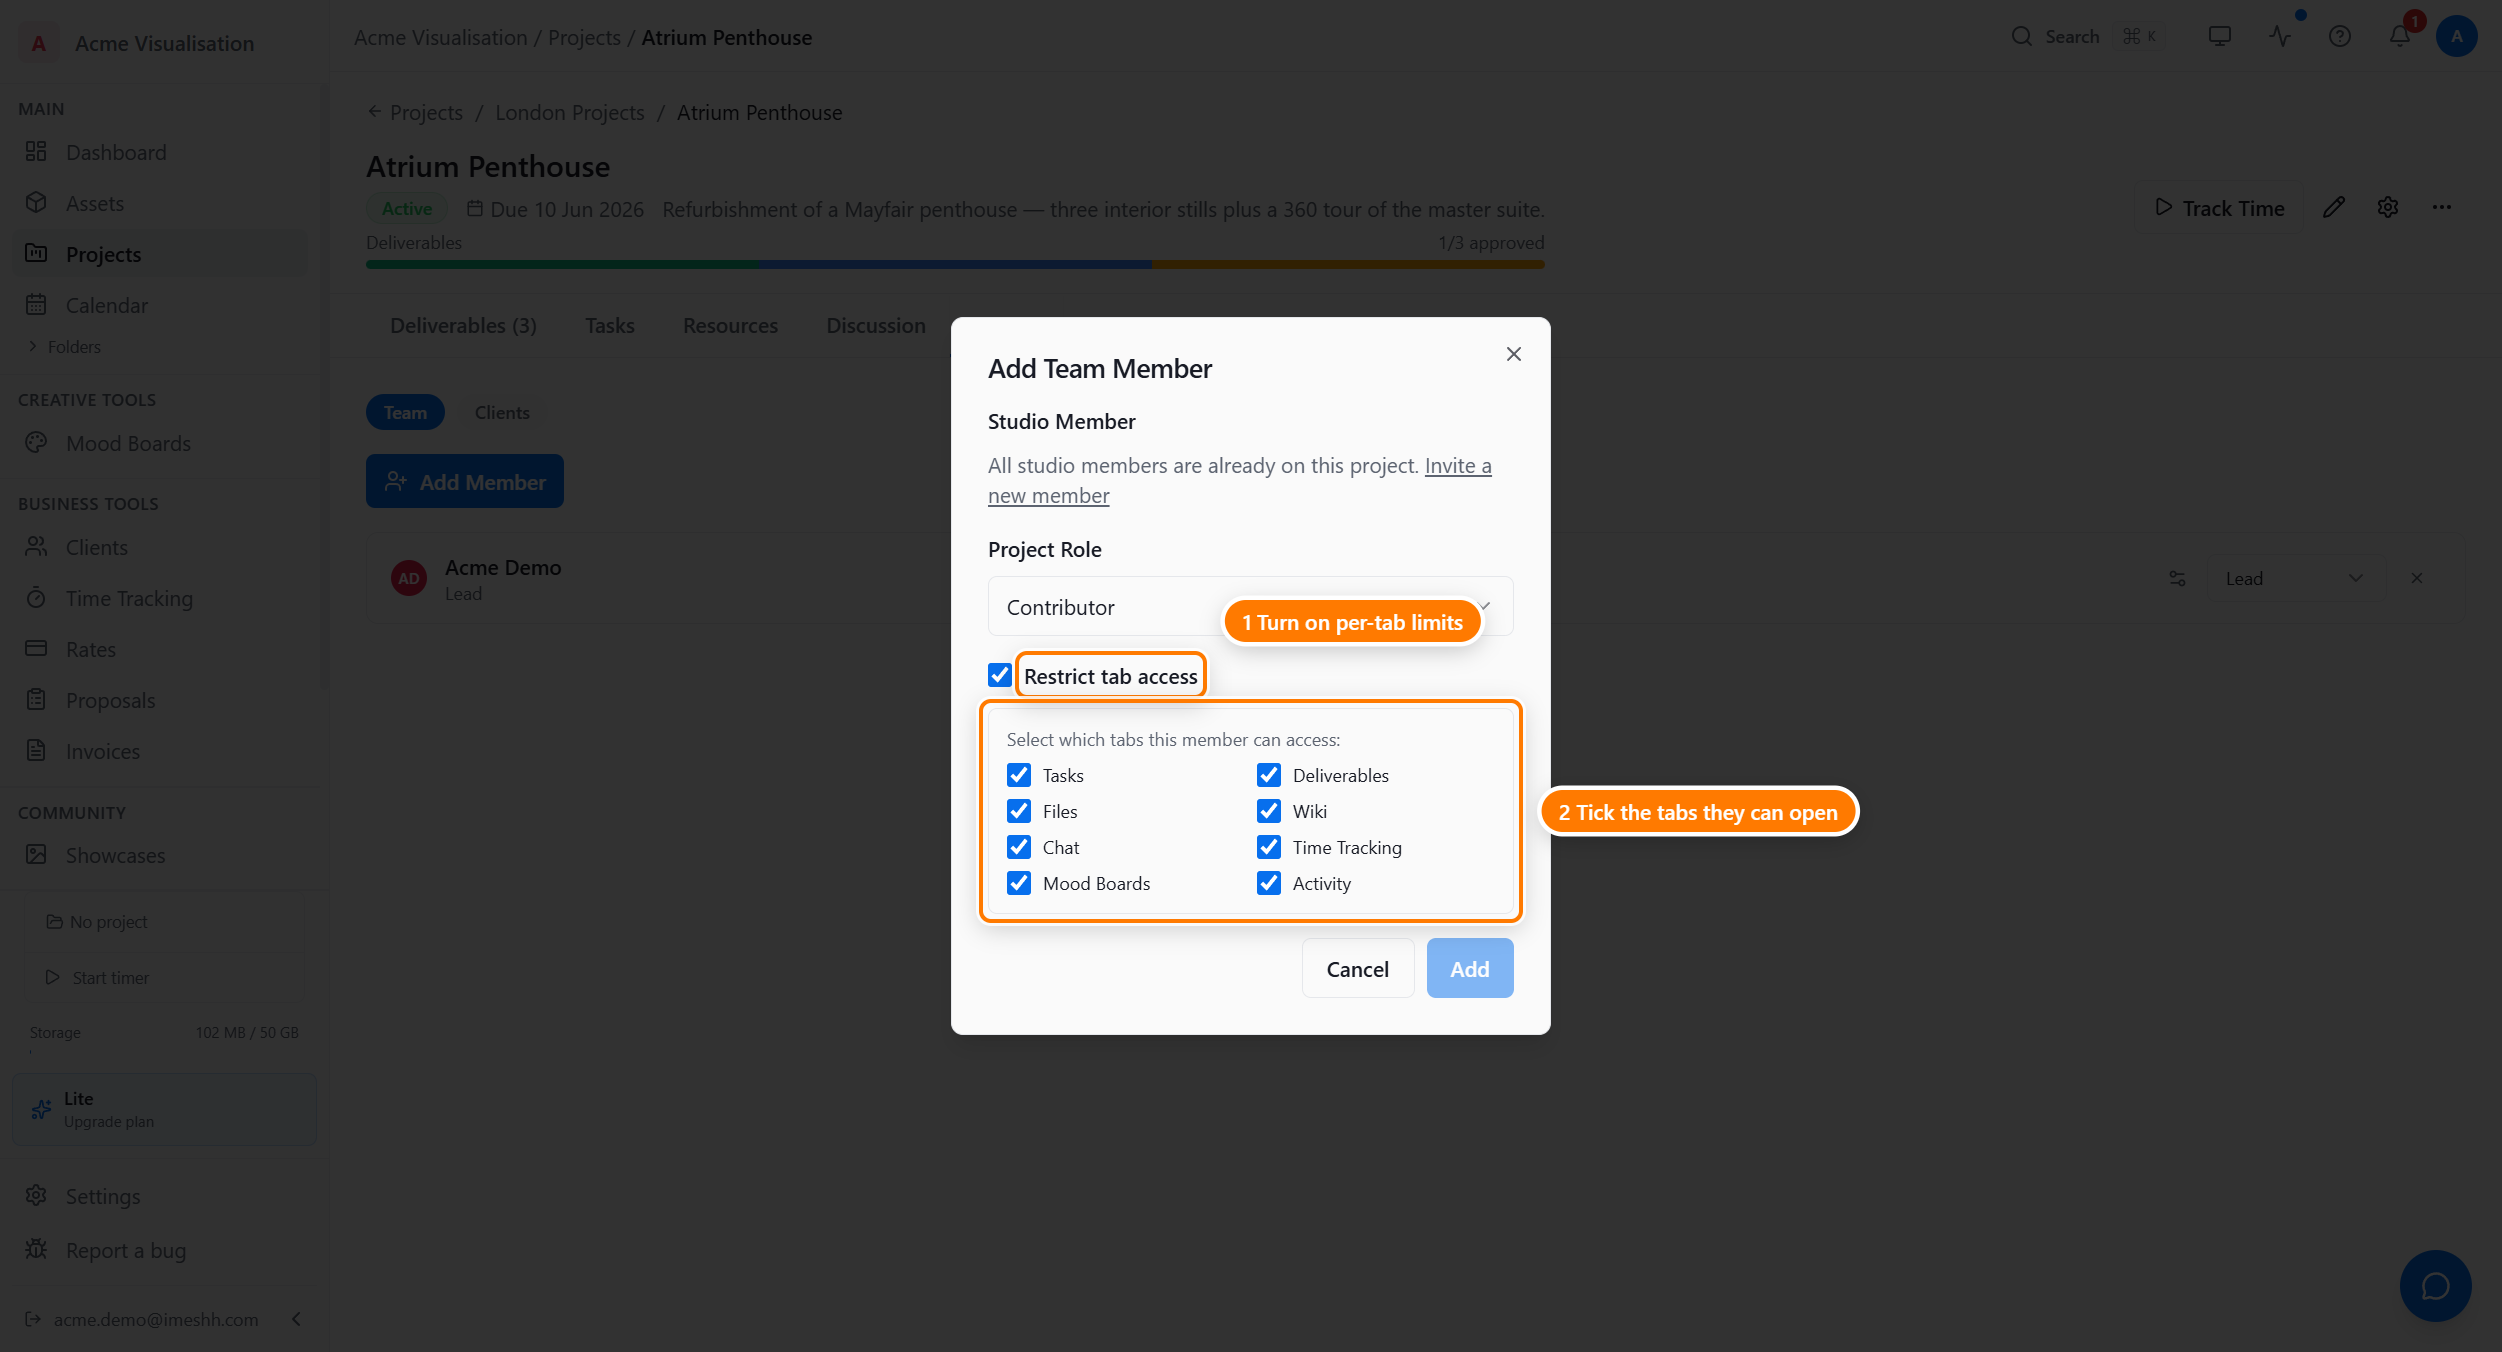
The eight surfaces you can hide:
| Tab or sub-tab | What it covers |
|---|---|
| Tasks | The whole Tasks tab |
| Deliverables | The whole Deliverables tab |
| Files | Resources → Files |
| Wiki | Resources → Wiki |
| Mood Boards | Resources → Mood Boards |
| Chat | Discussion → Team |
| Activity | Discussion → Activity |
| Time Tracking | Business → Time |
A few notes:
- Untick to hide. Anything left unticked won't appear in the member's tab bar at all.
- The restriction is per member, per project. The same person can have wide access on one project and restricted access on another.
- A lead can always edit permissions — they can't lock themselves out by accident.
- Turn Restrict tab access off and the member sees everything available to their role.
Changing or removing a member
On the People → Team tab, every row has a role dropdown and a small × icon:
- Change role — open the dropdown next to the member's name and pick a different role.
- Remove from project — click the ×. The member loses access immediately; they're not removed from the studio.
You can't remove the last Lead — at least one Lead has to remain on every project. Owners and admins who were auto-added as leads can't be removed either.
What's next
- Inside a project — the six tabs every member sees, subject to their permissions
- Sharing with clients — access for everyone outside your studio
- Discussion — the team and client conversation threads