time-tracking
Time Tracking overview
Track time across iMeshh Pro — the sidebar timer, the project and per-task timers, the global Time Tracking page, and how billable time feeds invoices.
Updated 24 June 2026
The Time Tracking section is your studio's record of every minute spent on client work. Each entry links to a project, and optionally a task, and is marked billable or non-billable. Time enters three ways — the sidebar timer, a project timer, or a per-task timer — and one record shows up in every view that lists it.
This page covers the Time Tracking page, the timers, and billable time. To add time after the fact, edit an entry, or filter the list, see Managing time entries.
The Time Tracking page
Open Time Tracking from the left sidebar to see every entry across every project in one list.
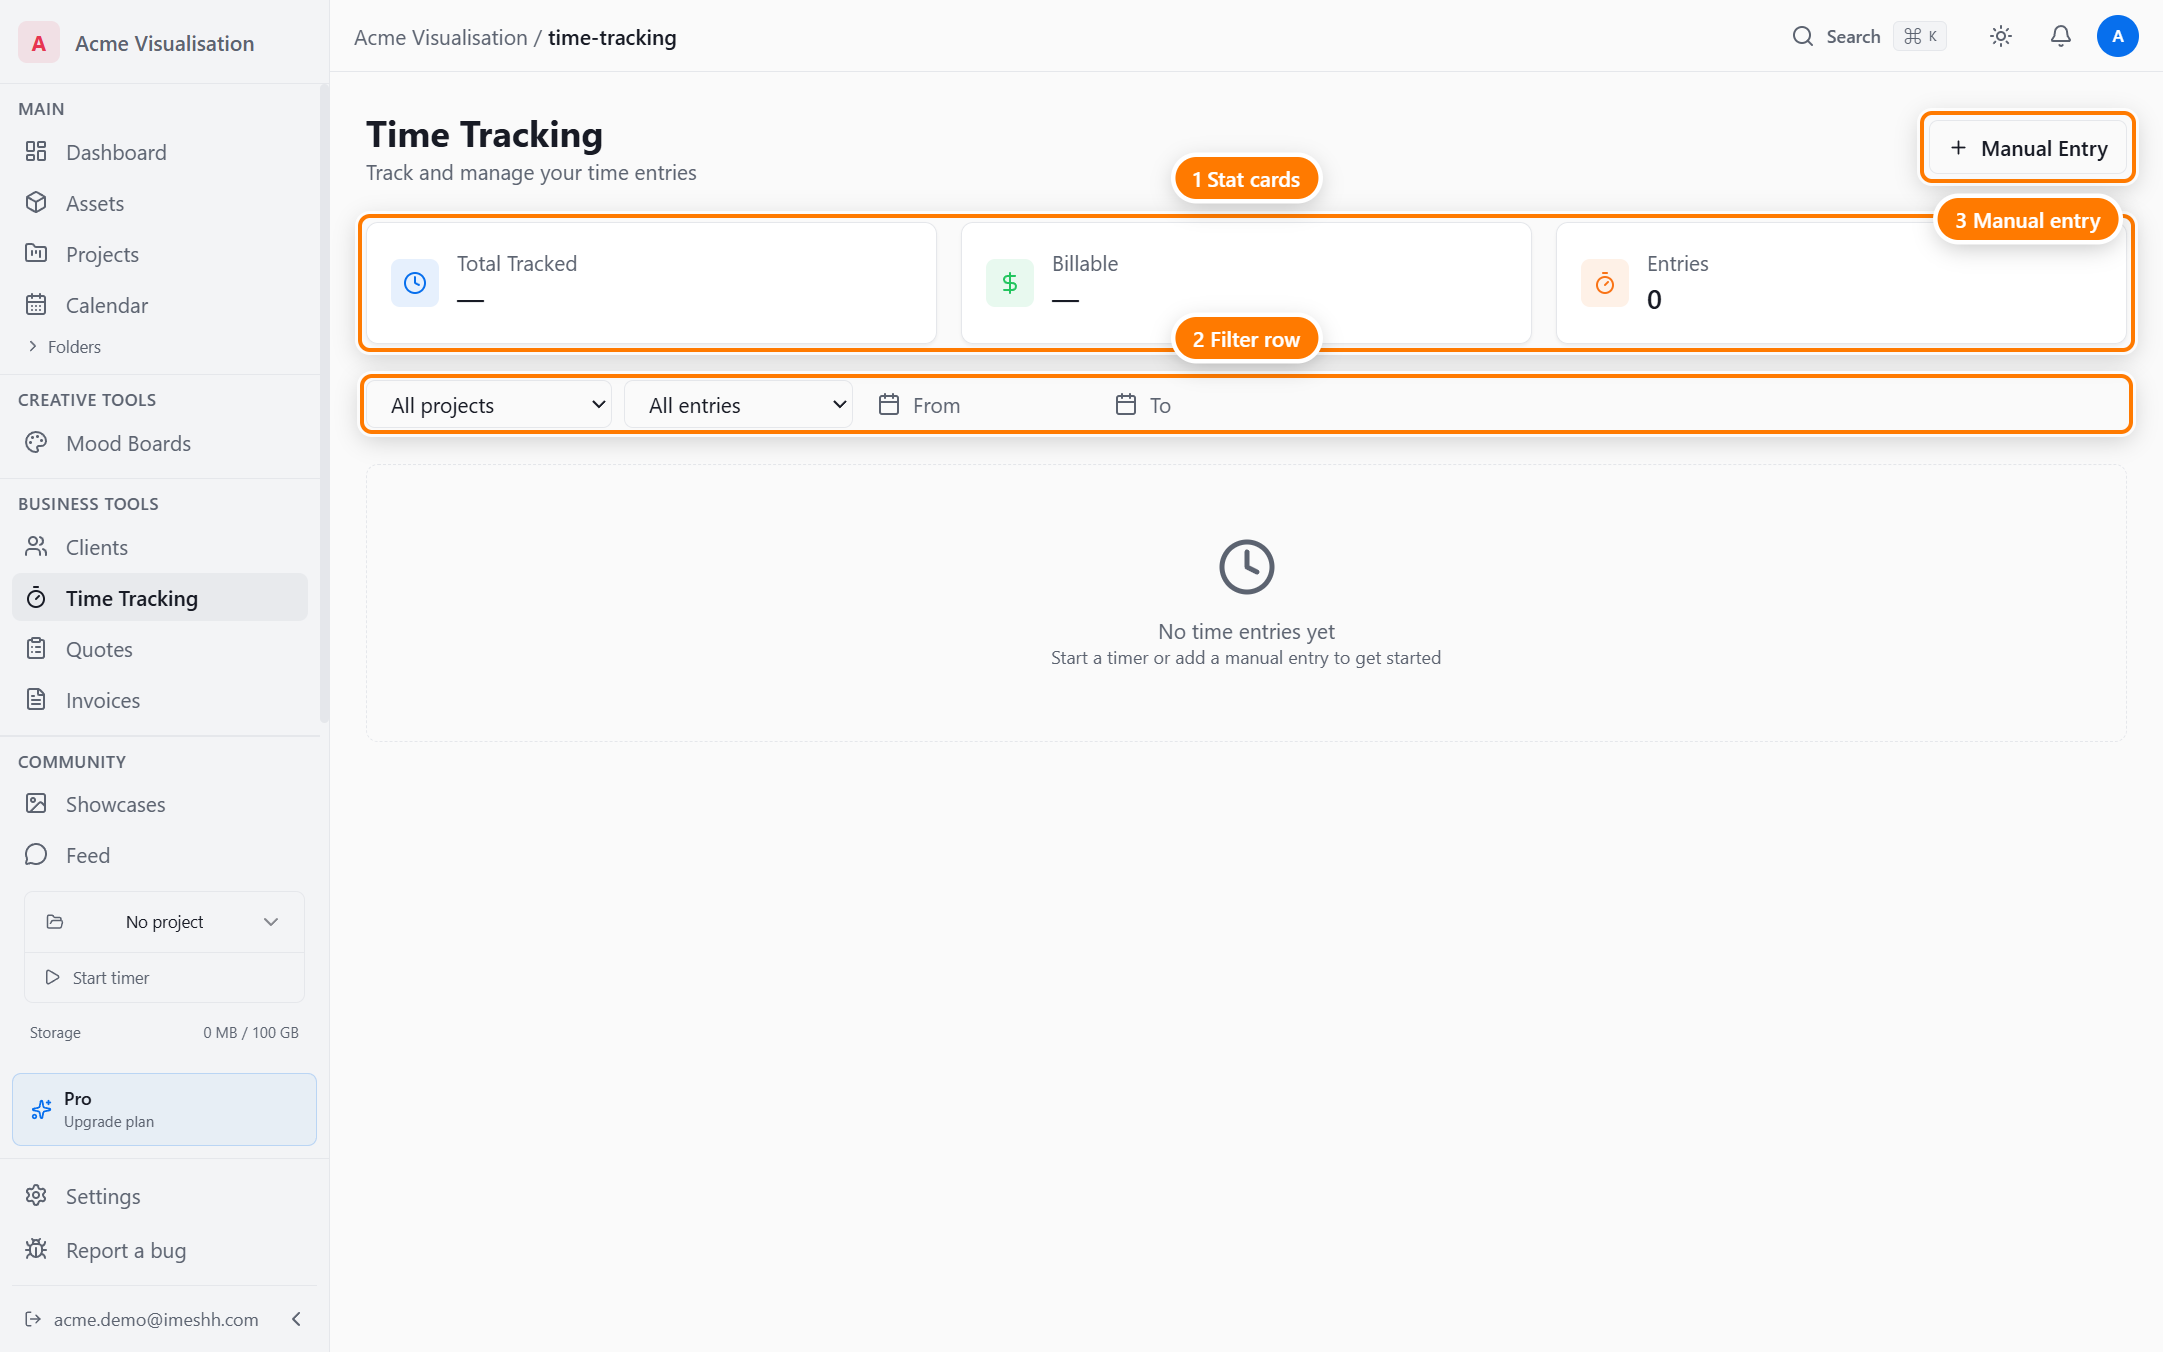
The page has three parts:
- Stat cards — Total Tracked, Billable, and Entries sit across the top. Each reflects whatever the filter row is set to.
- Filter row — narrow the list by project, billable status, and date range. The stat cards update to match.
- Entries table — one row per entry: date, description, project, task, time, duration, and a billable badge.
Three ways to track time
The sidebar timer
A timer sits at the bottom of the left sidebar at all times. Use it to start tracking from anywhere in the app.
- Click the timer to expand it.
- Pick a project from the project picker.
- Pick a task if you want to track against one — the picker lists only tasks that aren't done.
- Click Start.
The timer counts up with a live elapsed counter. Click Stop when you finish, and the session is saved as an entry.
The running timer survives a page refresh — when you come back, it's still counting.
The project timer
Click Track Time in the header of any project's detail page to track against that project without picking a task.
- Open the project.
- Click Track Time in the header.
- Do the work.
- Click the button again to stop.
The session lands as an entry on that project, with no task linked. Tracking is restricted to members and above; the server blocks attempts by roles without time access.
The per-task timer
Each task row has a small play/stop button in the Time Logged column (also mirrored on the task title row). Click it to track against that task — the entry counts toward both the task and the project total.
Use the per-task timer when you want time broken down per task or per deliverable, rather than per project alone. Stopping the timer adds the time to the task's tracked total straight away.
Billable vs non-billable
Every entry carries a Billable flag. It does two things:
- The Billable stat card and the per-project billable total count only billable entries.
- When you create an invoice and pull time from a project, only billable entries are offered as lines.
Mark internal work — studio admin, training, in-house R&D — as non-billable so it never lands on a client invoice by accident. Mark anything you'd charge a client for as billable, even if you decide to discount it later.
Where the same entry shows up
One entry appears in every view that lists it:
| View | Where | Shows |
|---|---|---|
| Global | Time Tracking (this page) | Every entry across every project, filterable |
| Per project | Project → Business → Time | That project's entries only |
| Per task | A task's tracked-time total | That task's time only |
Edit or delete an entry in any view and the others update — it's one underlying record.
What's next
- Managing time entries — add a manual entry, edit or delete an entry, continue a past session, and filter the list
- Projects → Business → Time — the per-project view
- Invoices — turning billable time into client invoices