rates
Rate cards
Build named price lists for your studio — add priced items, assign cards to clients, set a default — so proposals and invoices fill in the right prices.
Updated 24 June 2026
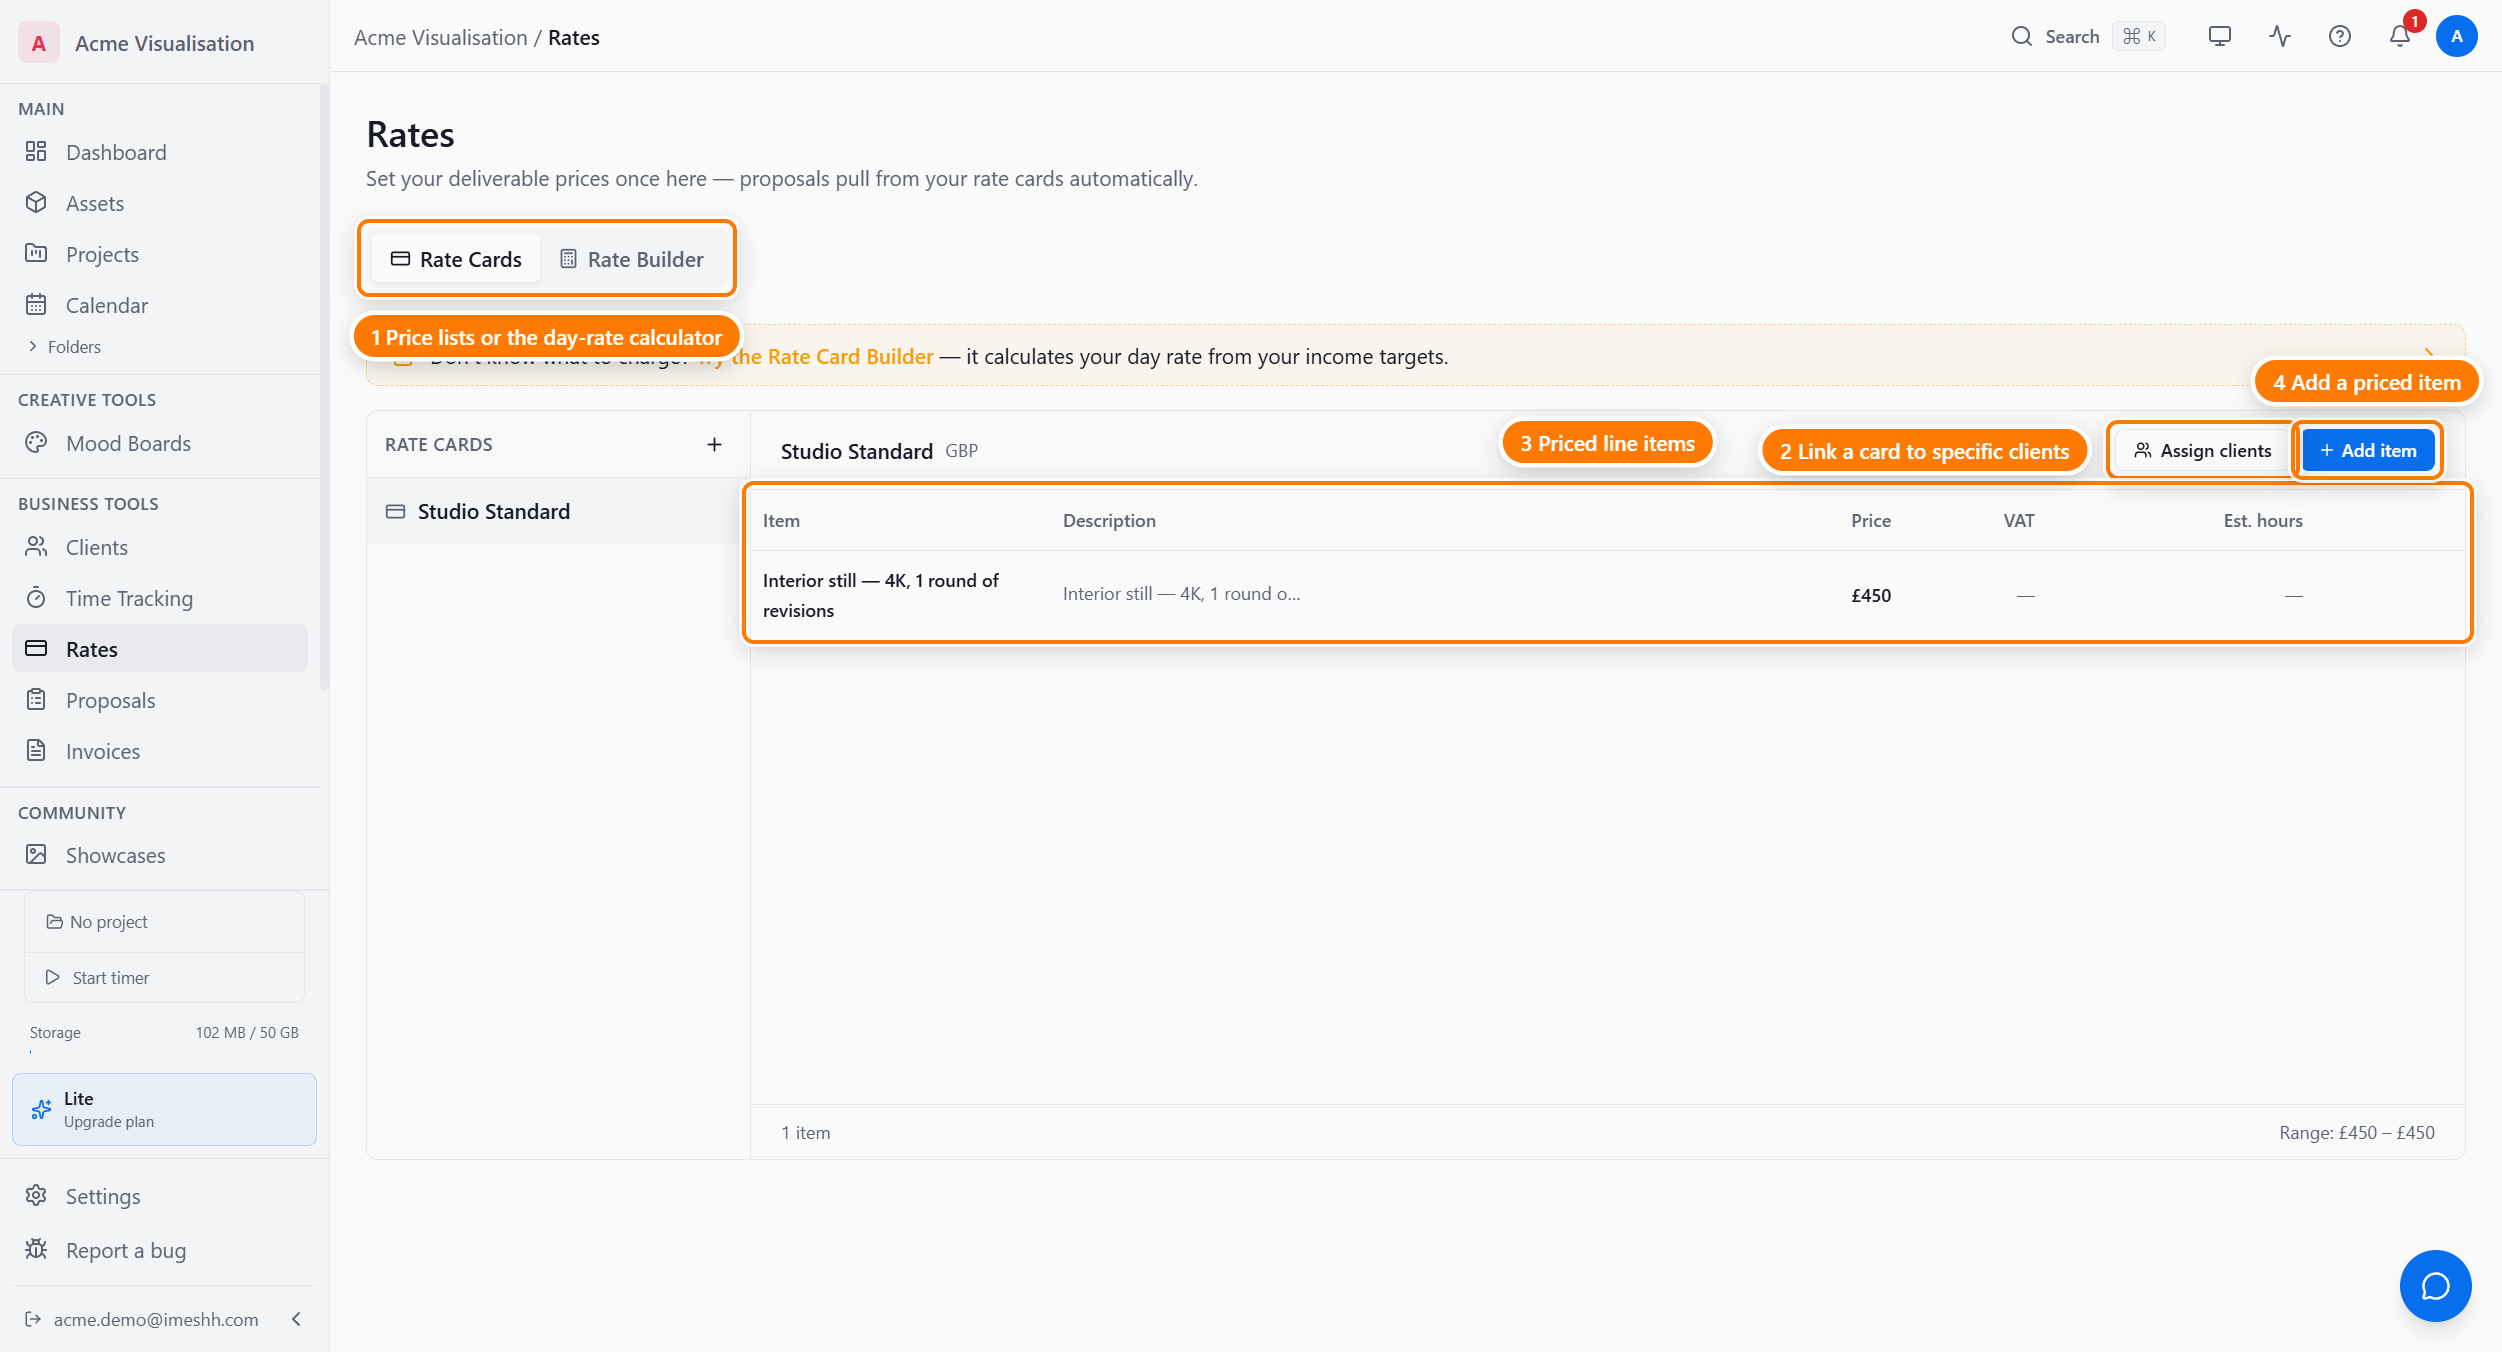
Rates is where you set up your studio's prices once, then reuse them on every proposal and invoice. Open Rates in the sidebar and you'll see two tabs: Rate Cards and Rate Builder.
- Rate Cards — named price lists. Each card holds a set of items (a render, a revision, a day of work) with a price, a unit, and optional VAT and hours. This page covers Rate Cards.
- Rate Builder — a calculator that works out a day rate from your income target, then turns it into a rate card for you. See Rate Builder.
When you build a proposal in Quotes or raise an Invoice, the prices come from a rate card. Set them up here once and you stop typing prices in by hand on every job.
What a rate card is
A rate card is a named list of things you charge for. Most studios keep one card per service tier or per client type — for example a Standard card and a Premium card, or a separate card for property developers.
Each card holds:
- A name — what you call the price list (e.g. "Standard Rates")
- A Default badge — one card is your default; new proposals start from it
- A set of items — the priced lines (see Items on a rate card below)
- Assigned clients — clients pinned to this card so their proposals start from it
There's no limit on how many cards you can build, and two cards can share the same name.
Create a rate card
- Open the Rate Cards tab.
- Click New Rate Card. A dialog opens.
- Type a name for the card.
- Click the create button. The card appears in the list on the left and opens ready for items.
Rename, duplicate, set default, or delete a card
Every card has a three-dot menu for the housekeeping actions.
- Point at a card in the left list.
- Click the three-dot menu that appears on the row.
- Choose an action:
- Rename — change the card's name.
- Set as default — make this the card new proposals start from. Only one card can be the default; setting a new one clears the badge from the old one.
- Duplicate — make a copy with all the same items. The copy is named
{name} (copy)and is never the default. - Delete — remove the card for good.
Items on a rate card
Items are the priced lines on a card — one row per thing you charge for. Click a card in the left list and its items fill the table on the right.
Each item has:
| Field | What it's for |
|---|---|
| Name | What the line is called on a proposal (e.g. "Still render") |
| Description | A longer note about what the line covers |
| Price | What you charge, in your studio currency |
| Unit | The label after the price (e.g. "per image", "per day") |
| VAT % | The tax rate for this line. Leave it blank to use the invoice's own rate |
| Hours | Your estimate of how long the line takes — used for planning, not billing |
| Default inclusions | The "What's included" text that auto-fills when this line is added to a proposal |
Add an item
- Open the card you want to add to.
- Click Add item. A dialog opens.
- Fill in the name, price, unit, and any of the optional fields.
- Click the save button. The item appears in the table.
Edit or delete an item
- Point at the item's row in the table.
- Click the edit (pencil) icon. The row's fields become editable.
- Change the name, description, price, VAT, or hours.
- Click save to confirm, or the delete (bin) icon to remove the line.
Set what's included
The Default inclusions field holds the "What's included" text for a line. When you add that line to a proposal, this text fills the inclusions box for you, so you don't retype it every time.
- Find the item's row in the table.
- Click the list-checks icon on the row.
- Type the inclusions text in the Default inclusions dialog.
- Click save.
Assign clients to a rate card
Pin clients to a card so their proposals and invoices start from the right prices automatically.
- Open the card you want to assign.
- Click Assign clients. A popover opens with your client list.
- Search for a client if the list is long.
- Tick the clients to assign to this card.
- Click save.
What's next
- Rate Builder — work out your day rate from your income target, then generate a rate card from the result
- Quotes overview — build a proposal that pulls its prices from a rate card
- Invoices overview — bill a client using your rate card prices