showcases
Create a showcase
Upload images, fill in the details, add content blocks and project data, then save a draft or publish. Plus editing and unpublishing.
Updated 23 June 2026
You build a showcase by uploading images, filling in a few details, and optionally adding rich content. You can save it as a draft and come back, or publish it straight to the Gallery. This page covers creating a new showcase and editing an existing one.
Start a new showcase
- Open Showcases from the sidebar.
- Go to the My Showcases tab.
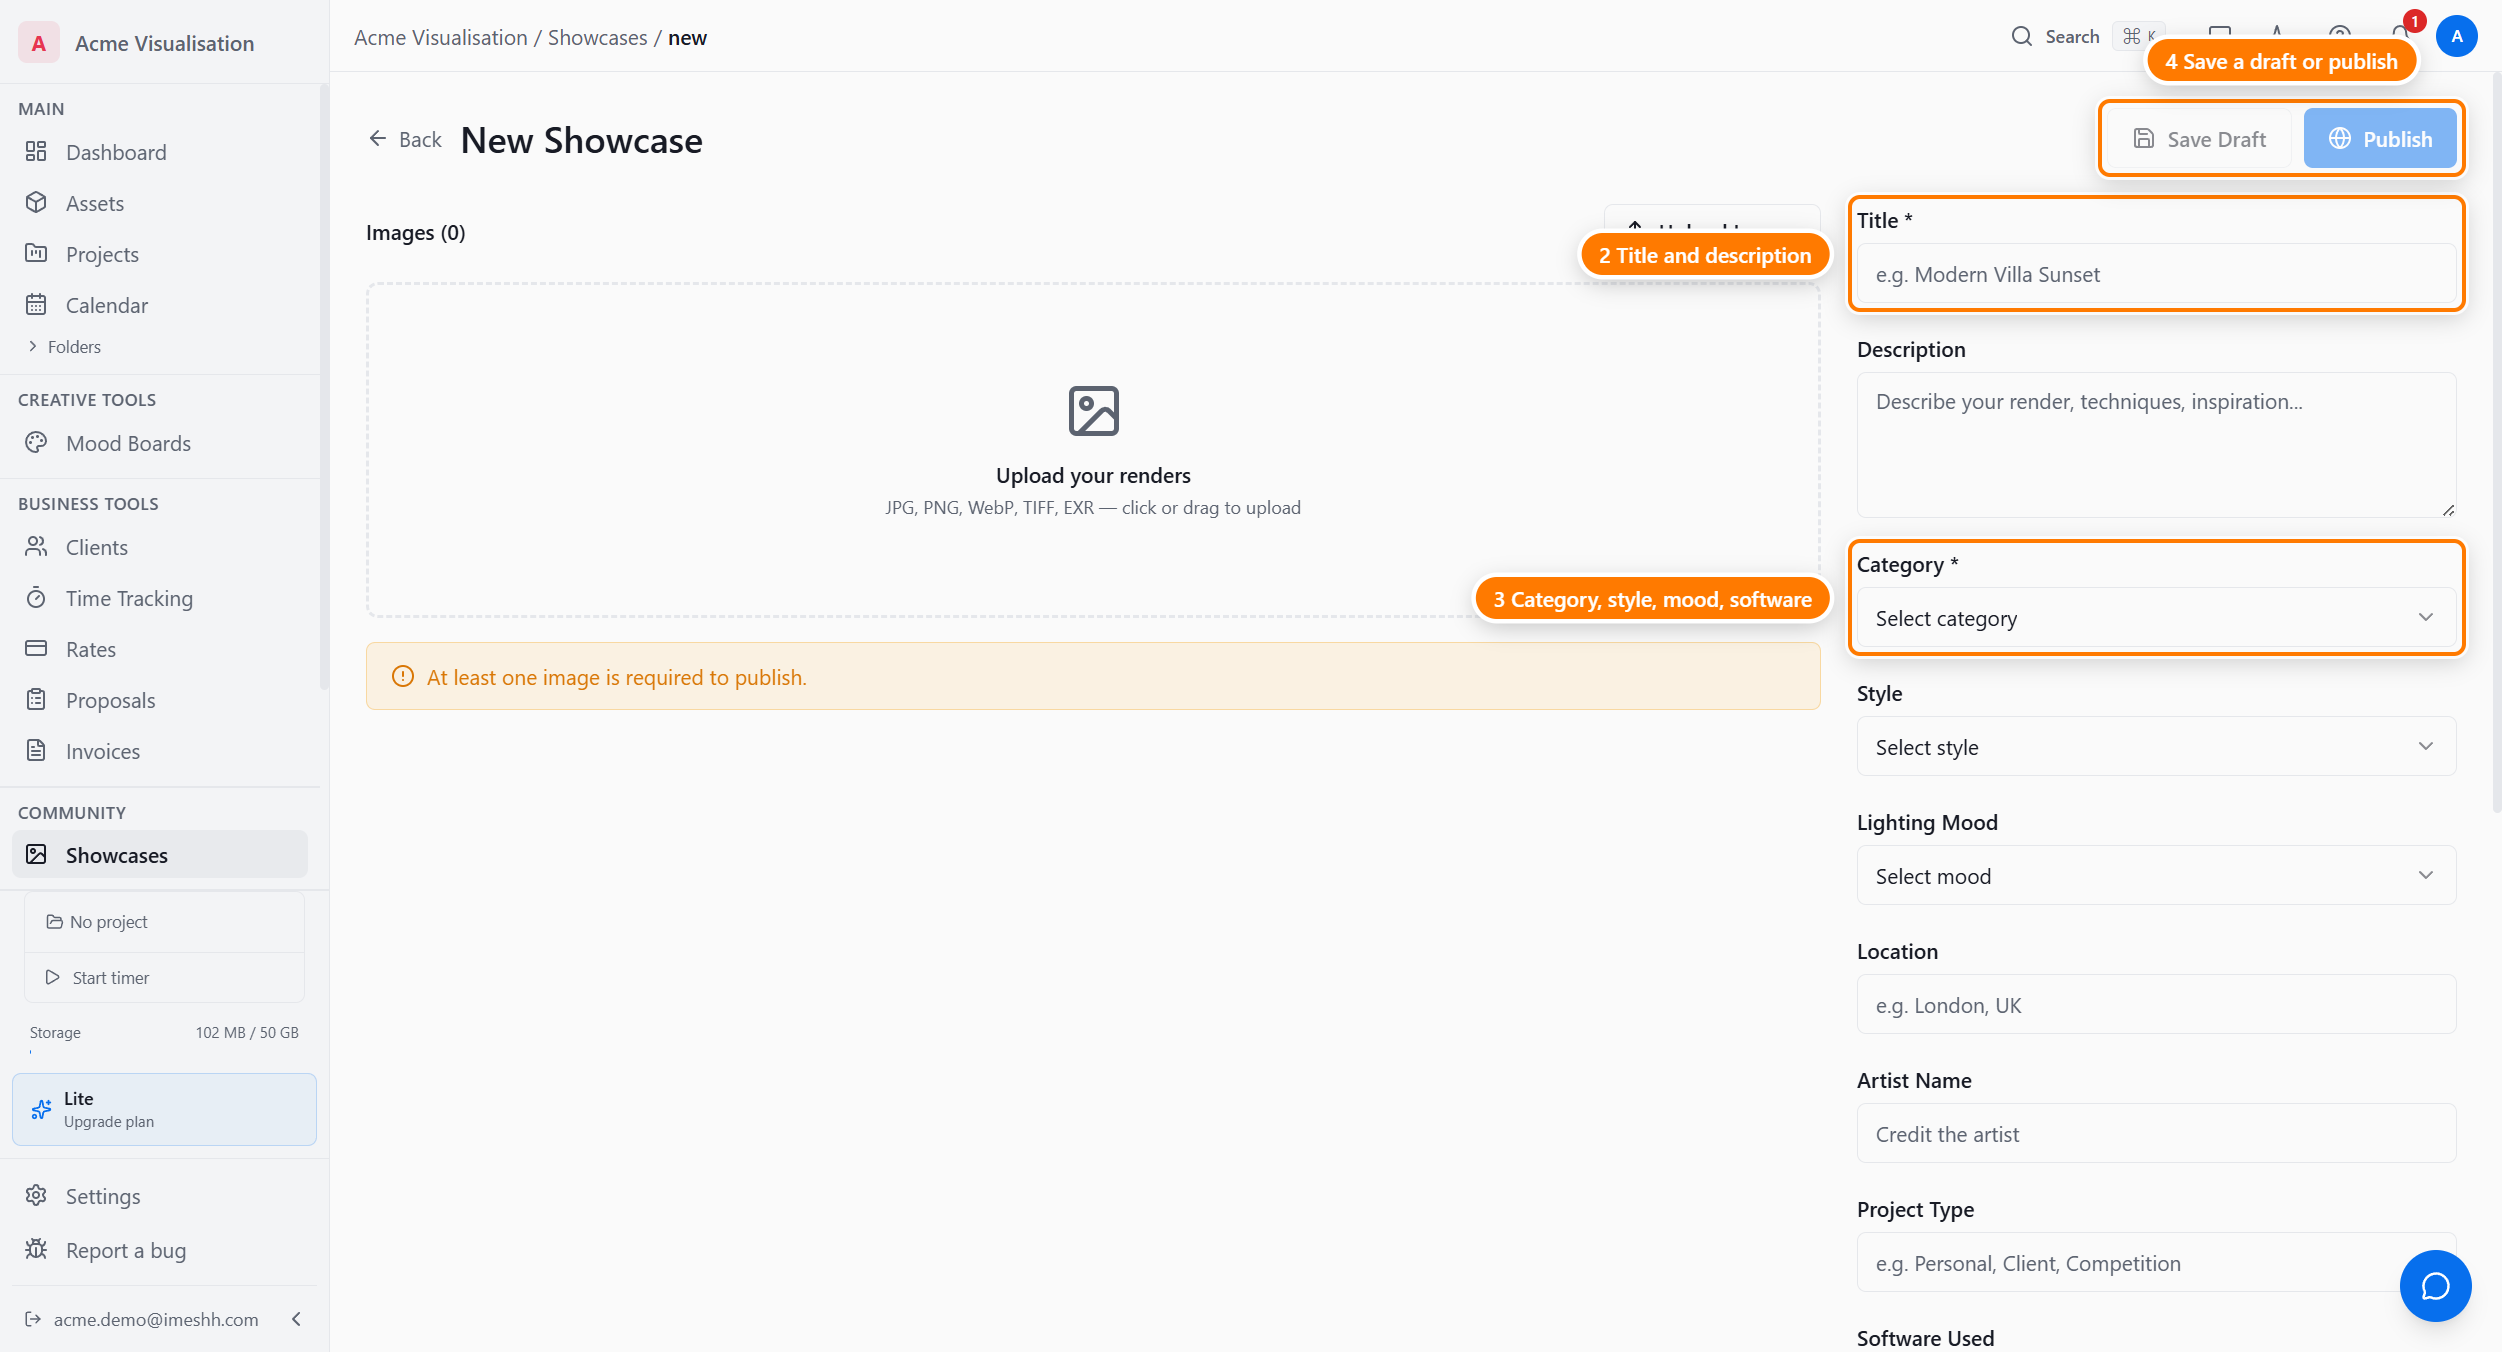
- Click Create showcase. The new showcase page opens with an empty upload area on the left and the details panel on the right.
Add images
- Drag your images onto the upload area, or click it to pick files from your computer.
- Watch the progress bar fill as each image uploads.
- Each uploaded image appears as a tile in the grid.
To reorder images, point at a tile and use the left and right chevron buttons that appear on it. There is no drag-to-reorder — the chevrons move an image one place at a time, and the new order saves straight away.
To remove an image, point at its tile and click the delete icon.
Fill in the details
Fill in the fields in the right panel. Title and Category are required — you cannot save or publish without them. The rest are optional and help people find your work:
- Title — the name of the showcase (required)
- Category — the kind of scene (required)
- Description — a short write-up of the project
- Style — the visual style
- Lighting — the lighting mood
- Software — the 3D software you used
- Location — where the project is set
- Artist name — who made the work
Add content blocks (optional)
Below the details you can build a richer page out of content blocks. Click a block type to add it; new blocks stack in order down the page. You can add up to 50 blocks per showcase.
The seven block types:
- Text section — a heading and paragraph of text
- Image — a single full-width image
- Image grid — several images laid out in a grid
- Before / after — two images with a slider visitors drag to compare
- Panorama — links a 360° tour by its tour name
- Video — an uploaded video file
- Timeline — a list of dated milestones
To rearrange blocks, use the up and down arrows on each block. To remove a block, click its delete icon.
Add project data (optional)
The Project data section records the production facts behind the work — hours, duration, delivery status, billable amount, revision rounds, approval date, and the tasks involved. Visitors see these on the showcase's sidebar.
You can fill these in two ways:
- Type them in — enter each field by hand. This works even when no project is linked.
- Import from a project — if you've linked the showcase to one of your projects, click Import from Project to pull the hours, tasks, and timeline straight from that project.
Save a draft or publish
Two buttons sit at the top of the page:
- Save Draft — keeps the showcase private to your studio. It appears in My Showcases marked as a draft and stays off the Gallery.
- Publish — sends the showcase to the Gallery for everyone to see.
To publish, you need a Title, a Category, and at least one image. If any is missing, the Publish button tells you what to add.
Edit a published showcase
To change a showcase after it's live:
- Open the My Showcases tab.
- Click the showcase you want to change. The edit page opens with the same layout as the create page.
- Make your changes — swap images, edit the details, add or remove content blocks.
- Click Save to keep your changes.
When a showcase is published, the edit page adds two buttons:
- View — opens the public page so you can see what visitors see
- Unpublish — takes the showcase off the Gallery and returns it to draft. Your images, details, and comments are kept; you can publish it again any time.
What's next
- Manage your showcases — the management list, unpublish, delete, and the calendar
- Browse the Gallery — see how your published showcase appears to visitors
- Your studio profile — the studio details shown alongside your showcases